Installing PowerCoach_1 on Windows
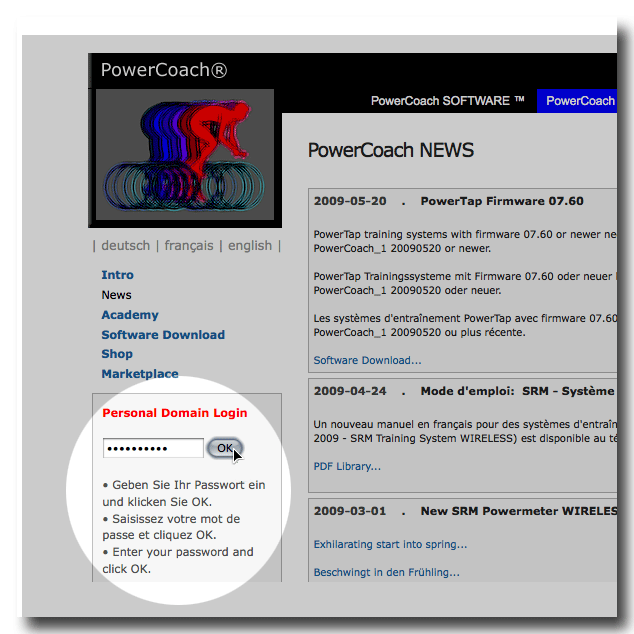
NOTE: To install PowerCoach_1 you need Windows XP, Windows Vista or Windows 7 on a computer with at least 1 GB memory (4 GB recommended).• Go to the Personal Domain Login of PowerCoach ACADEMY.
• Enter your password and click [OK]. From your Personal Domain, go to the Software Download page.
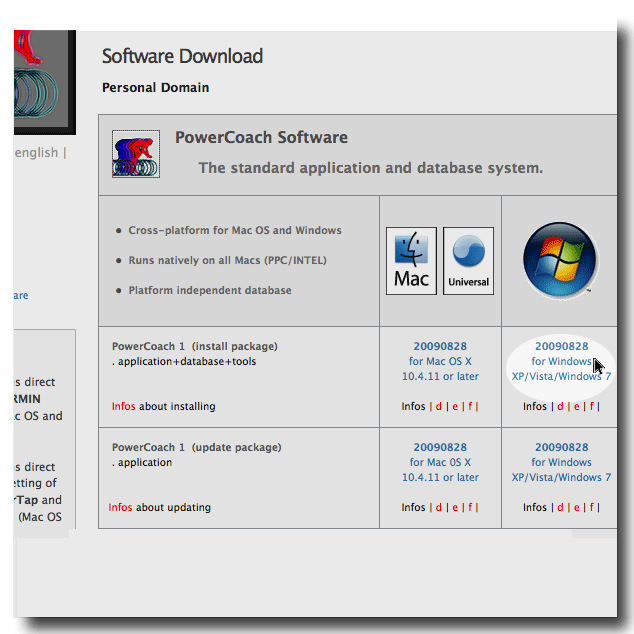
• From the Software Download page, download the following object:
- PowerCoach_1 (install package) for Windows
NOTE: Downloading does not work if you don't navigate to the Software Download page via your Personal Domain.
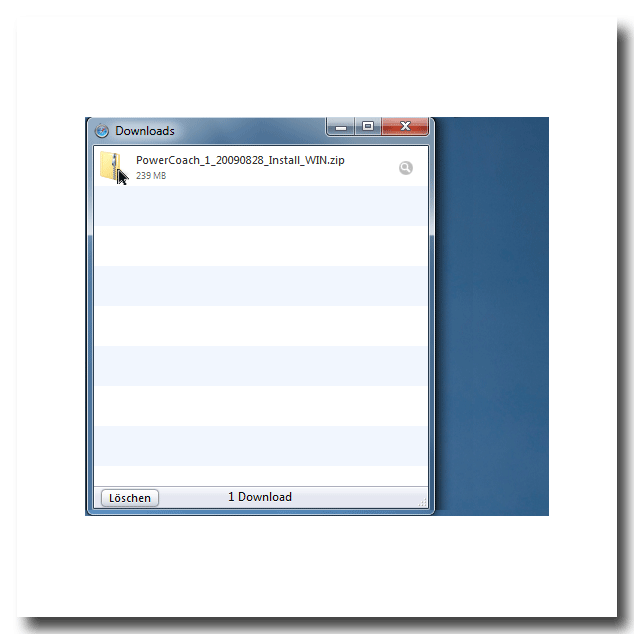
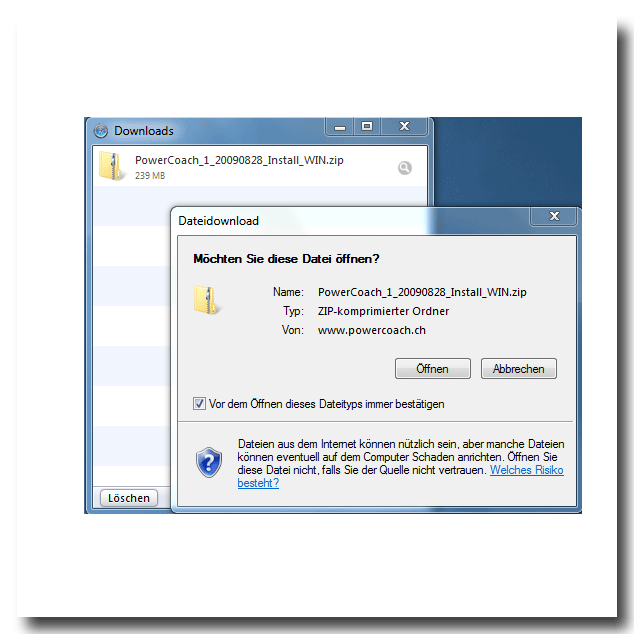
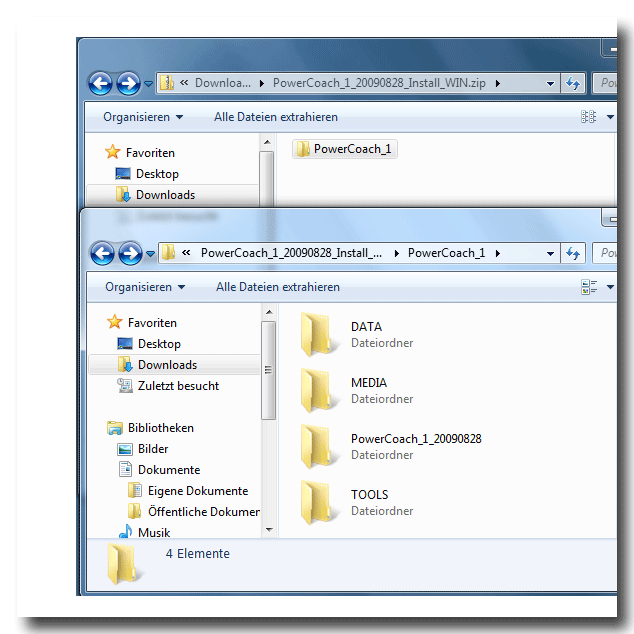
• Double-click the downloaded object PowerCoach_1_YYYYMMDD_Install_WIN.zip. This will show you the content of this zipped file.
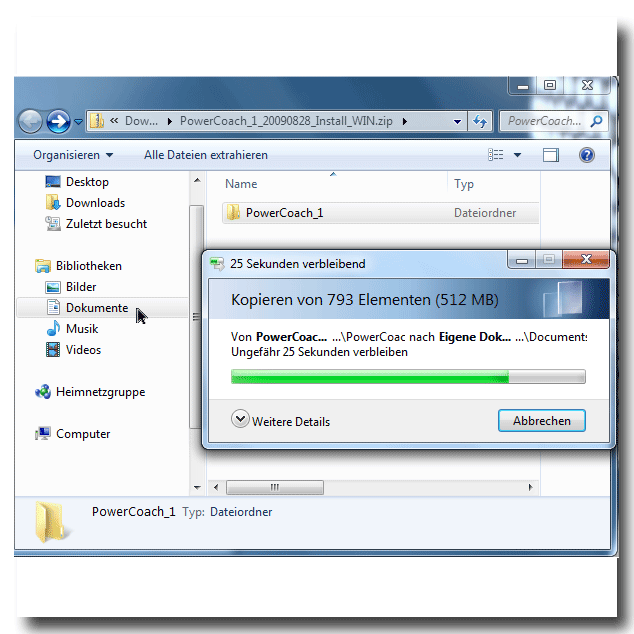
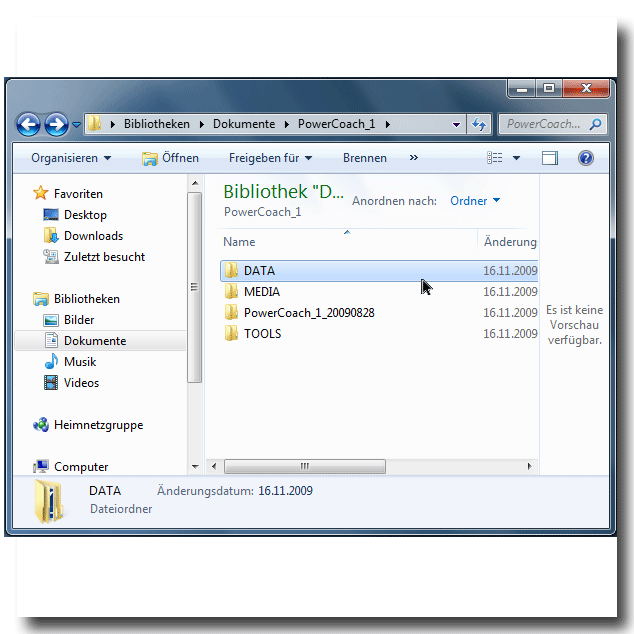
• Drag the folder [PowerCoach_1] to Documents. This will unzip all objects of the install package into that location.
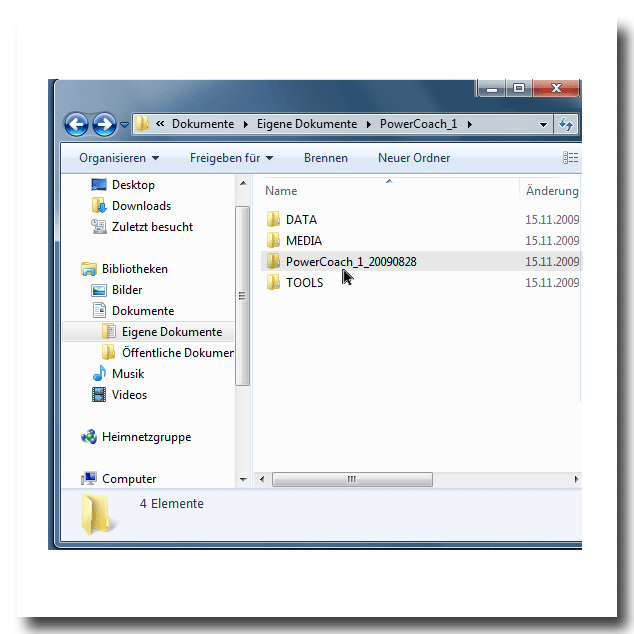
• Within Documents, you have now a folder named [PowerCoach_1] with following objects:
- [PowerCoach_1_YYYYMMDD] folder
- [DATA] folder
- [MEDIA] folder
- [TOOLS] folder
NOTE: The folder [PowerCoach_1_YYYYMMDD] is the PowerCoach_1 application program. The date YYYYMMDD denotes the release version.
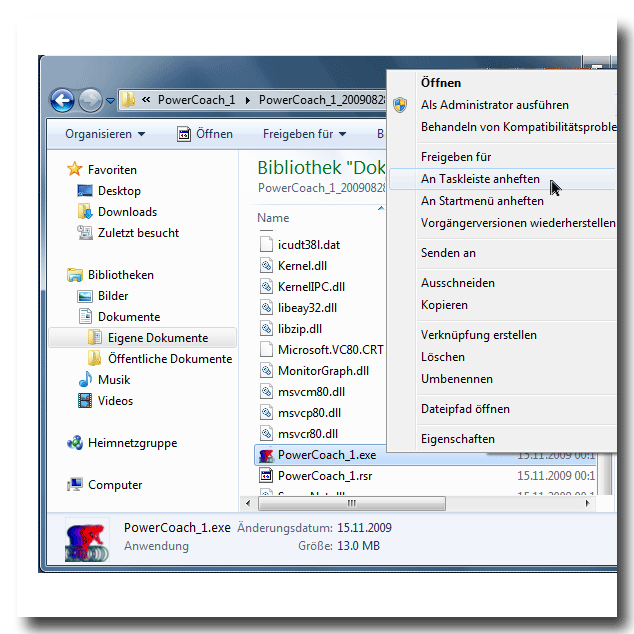
• To start the application program easily, create a short cut of
- PowerCoach_1.exe
located in [PowerCoach_1_YYYYMMDD]. Move this short cut to your desktop or taskbar.
• Launch PowerCoach_1 with a double-click on the short cut.
NOTE: We strongly suggest that you install PowerCoach_1 within Documents. If you install within Program Files, you must launch the program as an administrator having full read and write access to that location.
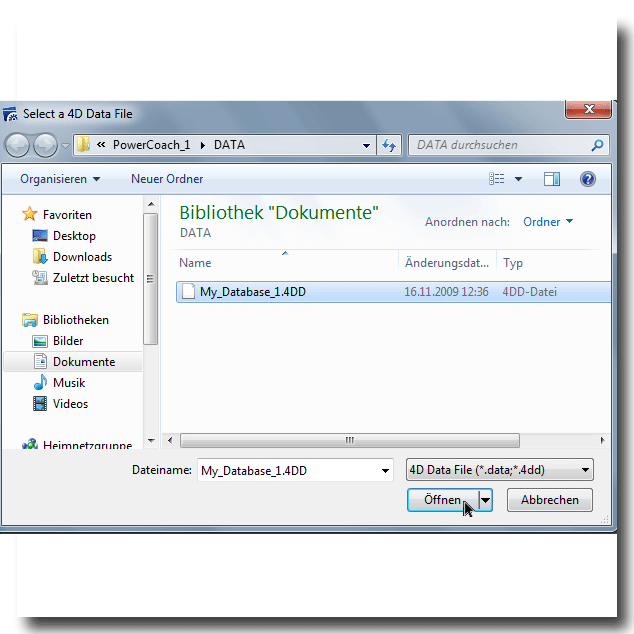
• When the dialog "Open" gets displayed, choose My_Database_1.4DD and cklick [OPEN].
NOTE: The database file My_Database_1.4DD is located in the [DATA] folder of [PowerCoach_1].
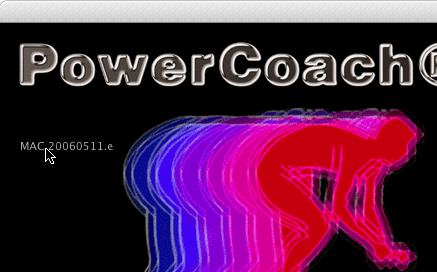
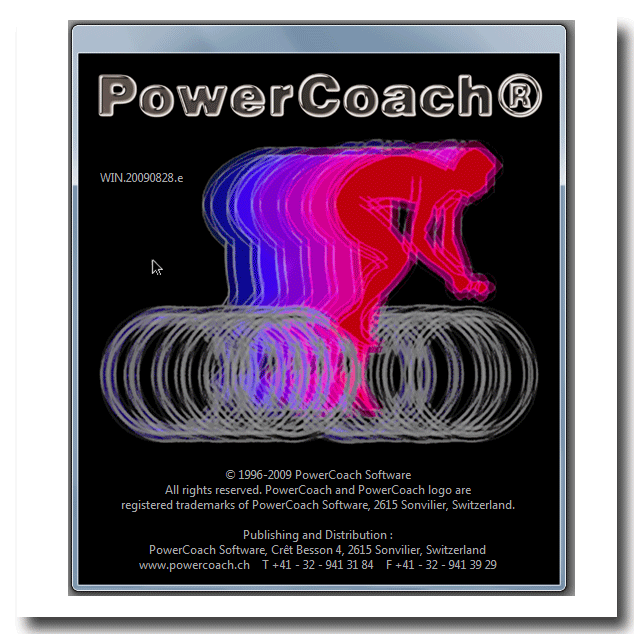
• When the start screen gets displayed, click the release version to choose your user language (English, French or German).
NOTE: You can choose the user language each time when starting the program. You may therefore select other languages in the future.
• Click anywhere else on the start screen to resume initialization.
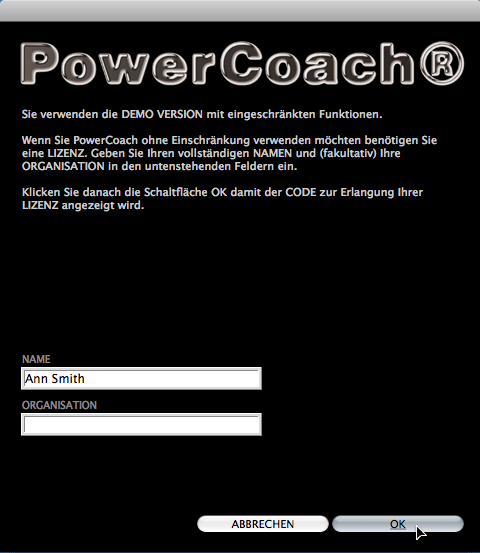
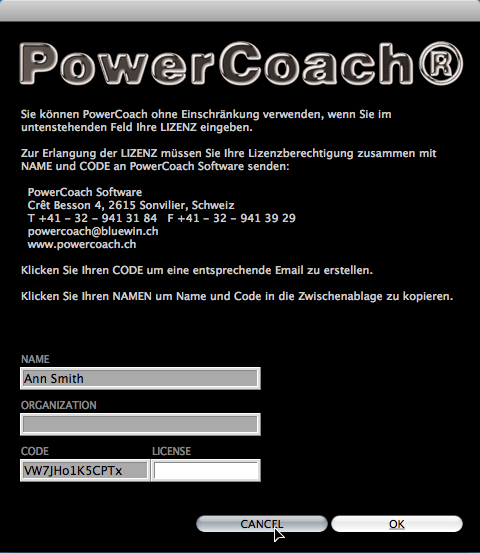
• When the LICENSE dialog gets displayed, enter your firstname and name into the first field. Optionally, enter the name of your organization into the second field.
• Click [OK] to get the next dialog with your license CODE and the LICENSE entry field.
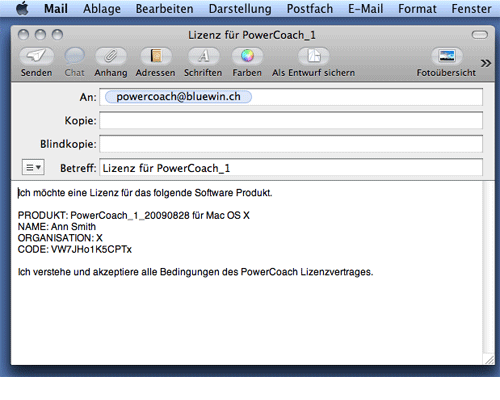
• To get your LICENSE, send your NAME and CODE to PowerCoach Software.
TIP: Simply click the license CODE and your email program will automatically compile a corresponding message for requesting the license.
See Tech Tip 20070312.
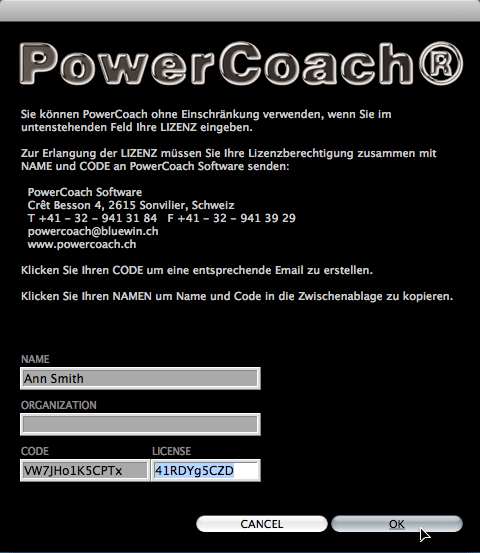
• If you don't know your license yet, click [CANCEL]. Once you know your license, enter the LICENSE and click [OK].
Congratulations.
You are ready to use PowerCoach software !You might want to start with the following steps:
- Downloading and importing data series...
Note: [CTR]+[Q] means, hold down the control key and hit the Q key simultaneously. If you are not familiar with symbols used in the PowerCoach documentation, click here.
Picture series...


Picture series (archive)...:
Choosing user language / Activation of license
Installing PowerCoach X / Launching the program
Windows XP settings